Can I Use Cricut Design Space on My Ipad
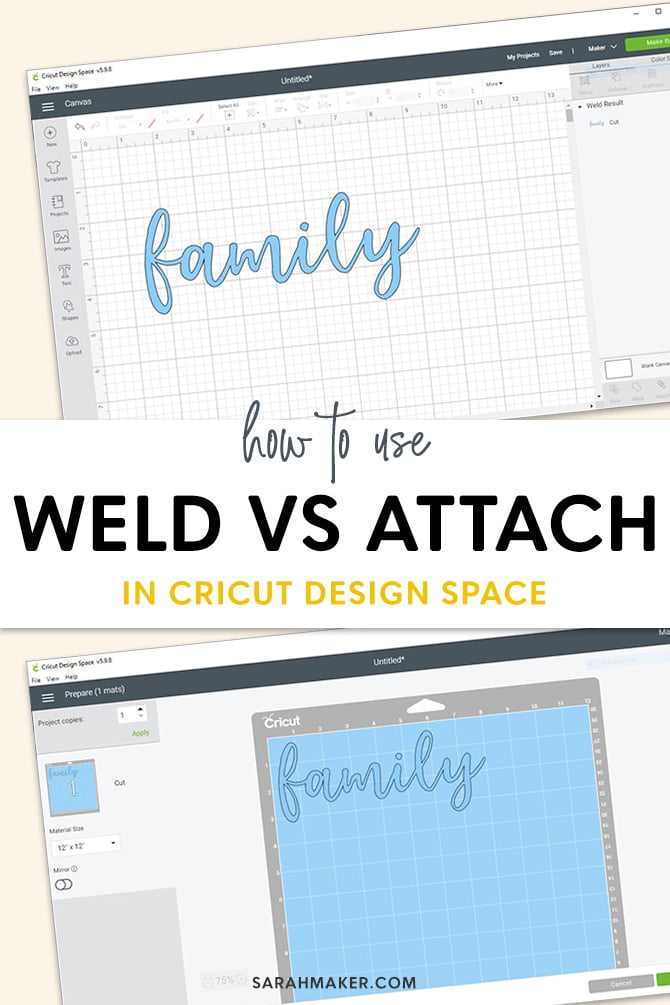
Wondering what's the difference between Weld and Attach in Cricut Design Space? Here's everything you need to know about Weld versus Attach. Plus, I'll walk you through the process with step-by-step sample images to show you when to use them.
I am excited to share with you another Cricut Design Space tutorial. Today I want to talk about two functions within the Design Space software that often to get confused: Attach and Weld.
I know that when I first started using my Cricut machine, I had a bit of trouble trying to understand the difference between these two tools. Have you had the same experience?
Once you understand these tools, Cricut Design Space will be SO much easier and fun to use! You'll be able to use the program better and create designs more quickly.
Learning new tools and techniques within Cricut Design Space does take a bit of time and practice. My goal is to empower you to start creating your own Cricut designs with confidence!
Attach vs. Weld in Design Space
Let's focus on the Attach and Weld tools within Cricut Design Space.
Attach and Weld can seem similar at first glance, but they will give you very different results when it's time to send your design to the mat.
In brief, the Attach tool keeps your shapes in the same arrangement when you send the design to the mat to cut. The shapes are still separate pieces, but their layout is frozen in place.
The Weld tool unites two or more separate shapes into one single shape. The shapes are no longer separate but fuzed into a single shape. (The shapes don't actually have to be overlapping in order to weld them together – and I think this is where a lot of the confusion stems from.)
Let's talk about these concepts in a bit more detail.
What Does Attach Do
The Attach tool has two functions: fixing the position of cut layers, and attaching Draw or Score layers to cut layers.
(For the purposes of this article, we will focus on the first function. You can learn more attaching Draw or Score layers in my in-depth article here:)
You can use the Attach tool to keep your cut layers in the same position relative to each other. When you use the Attach tool, the layout you see on your Design Space canvas will be the same layout you see when you send the design to the cutting mat.
Why is the Attach tool useful? By default, the Cricut software will try to rearrange your cut layers in such a way as to conserve material. If you don't use the Attach tool to preserve the layout, Design space will automatically place the shapes on the cutting mat as close together as possible.
So, you will want to use the Attach tool to holds your cut layers in place so that images on the cutting mat are positioned exactly as they are on the Design Space Canvas.
Secondly, you can use the Attach tool to fasten a Draw or Score layer to a cut layer. You can learn more about this second function in my article all about the Attach tool, here:
When to Use Attach
When you are working on a project with different shapes or letters, and you want the layout to stay fixed when you cut it, you can use the Attach button to freeze the layout.
If you have a multicolor design, you will want to attach pieces of the same color so they cut on the same mat.
Your design components don't need to be overlapping or touching in order to Attach them. And, even if they are overlapping, Cricut will cut out attached shapes as separate pieces.
You will know that your images are attached because they will be labeledAttach in the Layers panel.
Later, if you need to make layout changes, you can use the Detach button to unfreeze the layout.
What Does Weld Do
When you think about Welding in Design Space, think about welding metal. The two pieces melt and fuse together to create a permanent bond. They are no longer two separate pieces of metal, but one single piece.
Similarly, the Weld tool in Design Space joins two or more separate shapes to create one single shape. It removes any overlapping cut lines to create one unified image. Wherever cut paths have intersected, only the exterior cut path will remain.
You can use the Weld tool to combine shapes or connect letters. Whatever shapes or letters you Weld together will turn the same color and be cut on the same mat layer.
You will know that your images are welded when they change to the same color and a new image appears in the Layers panel.
When to Use Weld
You can use the Weld tool whenever you'd like to permanently join two or more separate shapes into one single shape that you want to cut out as one piece.
For instance, you can use the Weld tool to connect cursive letters so that they will cut as one piece. When you Weld the overlapping letters together, the lines in between the letters disappear and the individual letter shapes merge to become one single shape.
In addition, you can more create complex shapes by overlapping the simple shapes you can find in Design Space. Then, when you Weld them and send the resulting image to the mat, it will cut as one single shape.
For even more information about the Weld tool, and lots more example, click here: How to Weld Text and Images in Cricut Design Space
Examples in Cricut Design Space
Let's open up Design Space together and we can walk through some examples.
Note: If you don't already have Cricut Design Space, you can download it for free. You can use the program on Mac, Windows, iOS (iPhone or iPad), and Android devices.
How to Attach and Weld Text in Design Space
Let's look at an example of using the Weld tool to join script letters in Design Space.
First, open a new Canvas in Design Space, and use the Text tool to type a word in a script font. Click on the Advanced drop-down menu, and click Ungroup to Letters.
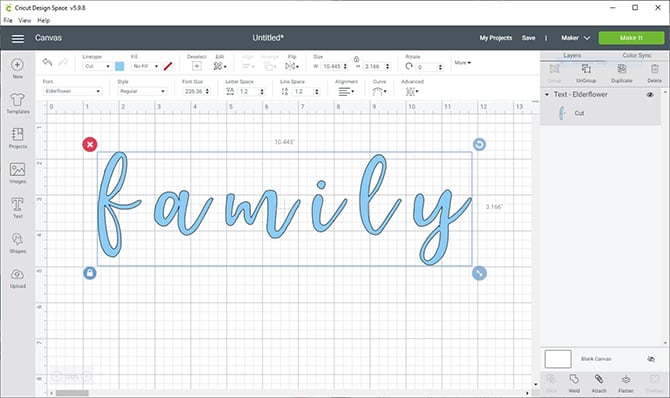
Move the letters until they are overlapping. Select all of the letters in the word, and press the Attach button.
If you look closely around each letter, you can see a thin black line. The line is telling you that each of the letters is its own individual shape. They are "attached" to each other, in that their position relative to each other is fixed. But, they are still separate overlapping shapes.
You will know that your letters are attached because you will see the Attach heading in the Layers panel, as well as each letter as a separate image.
When you send the attached letters to the mat, you will see that their position relative to each other remains the same. The arrangement is fixed. However, each of the letters will be cut individually. (The black line shows you where the Cricut will cut.
Welding Script Fonts
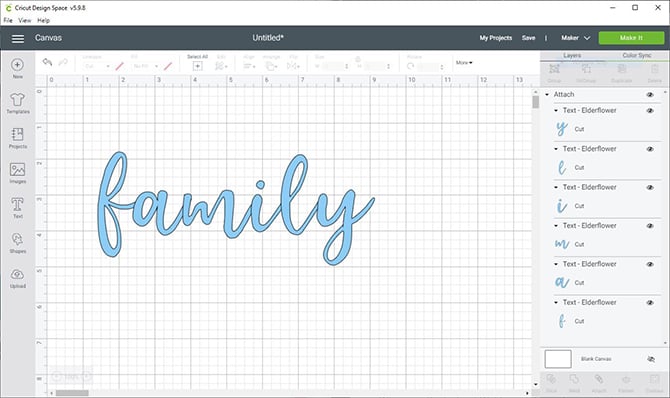
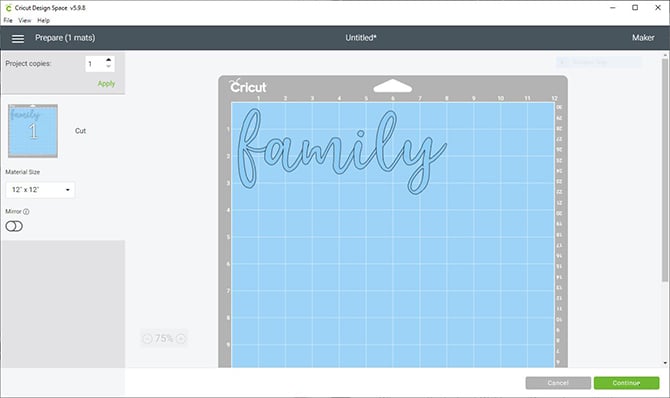
Okay, let's go back to the Design Space canvas. Select all of the letters and click the Weld button.

Immediately you will see a difference. The thin black lines between each of the letters are gone. This tells you that all of the letters are merged, creating one single shape.
You will know that your letters are welded because you will see a single shape in the Layers panel on the right-hand side.

Then, when you go to the mat, you will again see the word as one shape.
How to Attach and Weld Shapes in Design Space
Let's walk through an example of using the Attach and Weld tools with basic shapes in Design Space.
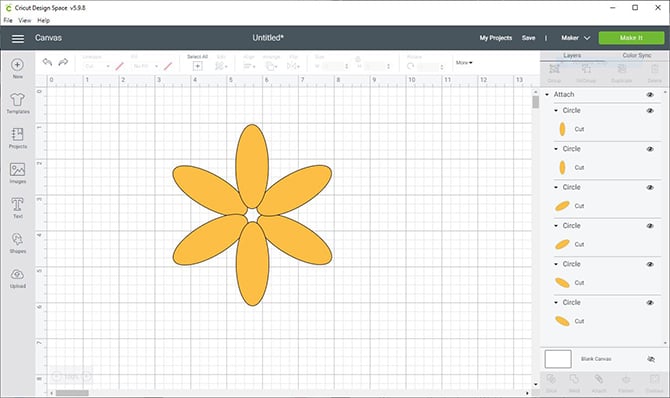
Open up a new canvas, and use the Shapes tool to draw six circle shapes. I resized the shapes into ovals, and then rotated and moved them to form flower petals.

When I try to send this image to the mat as is, you can see that the Cricut software rearranges the position of the petals to conserve mat space and materials.

So, we can go back to the Canvas and use the Attach button to freeze the layout.
When we send the image to the mat again, we see that using the Attach button has fixed the position of the petals relative to each other.
However, the thin black lines around each of the 6 petals tell us that the Cricut will cut each petal out individually.

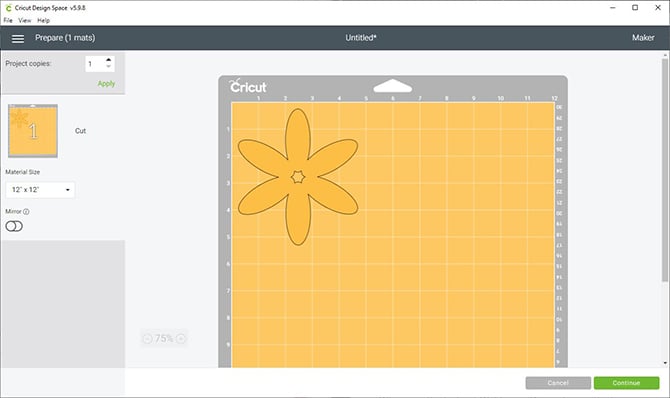
Alternatively, we could go back to the Canvas and use the Weld button to merge all of the petals into one single flower shape.

Then, when we send the image to the mat, we see that the Cricut will cut all 6 petals as one single flower shape.
Have questions? Join the Facebook Group!
I hope this article was useful for you! If you have any additional questions, feel free to join my Facebook Group. I created this group for you to share pictures, ask questions, and help each other out.
What's Next?
Pin this post: Save this tutorial to your Pinterest boards so that you can come back to it later.
Leave a comment: I love to hear your feedback. Tell me in the comments below!
Share on Instagram or Facebook: When you make this project, share it on social media and tag me @sarahmaker. I love to see what you make!

Sarah Stearns has helped thousands of makers find their next craft project with free patterns and step-by-step tutorials on her blog, sarahmaker.com. Read more.
Her work has been featured in Scientific American, Good Housekeeping, Vox, Apartment Therapy, and more.
Can I Use Cricut Design Space on My Ipad
Source: https://sarahmaker.com/weld-vs-attach/